• Welcome to AppraisersForum.com, the premier online  community for the discussion of real estate appraisal. Register a free account to be able to post and unlock additional forums and features.

How to build your own appraisal form in Excel (a primer with pics)

Status
Not open for further replies.

George Hatch

Elite Member
Gold Supporting Member
Joined
Jan 15, 2002
Professional Status
Certified General Appraiser
State
California
This thread will include a series of posts with pics and explanations to show how how you can build appraisal forms in Excel. Because I'm posting a tutorial, please don't add any more posts to this thread until I finish it - which will probably take a couple days. If you want to add a like to the bottom of the page that's fine but we want readers to be able to go through this sequence without any distractions.

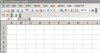
Feel free to follow along on Excel or Calc (which is an open source freebie you can download) or any other spreadsheet program.

I like using a spreadsheet program to build reports in because in addition to the "reporting" I can also program all the math and calcs I'm using directly into the form. I can edit the "hardwired" verbiage on the forms to say whatever I want to say and I can delete everything I don't intend to say. I can customize from one assignment to the next. If I want to add 3 more pages to talk about a site I can add them directly into the body of the report and without having to refer a reader to an addendum in the back. Basically, my reports all read from front to back. I don't refer to any addenda other than my exhibits.

Some examples of custom forms you might consider:

Rental Value appraisal
Land appraisal form (one that actually works)
Multi-family that isn't all jacked up like the 2055 or obsolete like the 71b
Your own SFR form
Various addenda form
Market conditions analysis
Insurable Value analysis

Etc

I'm going to lead you guys through some of the basics so you can get an idea of how simple it is to do.
 

Attachments

  • pg1.JPG
    pg1.JPG
    96 KB · Views: 57
The first step is to know your spreadsheet program. How to open a file, save a file, do a "save as" on a file, how to add/delete pages to the worksheet, and how to configure your toolbar to include the functions you're using and to remove the functions you won't be using. There are plenty of how-to articles on this topic so I'm not going to repeat them here. Just understand that if you already know some of these basics for your spreadsheet program it's going to take you a couple hours to figure that out.

The second step is to configure your toolbar and view and such. Here's a screengrab of how I set my toolbar up. This isn't the only way to do it but it's one way. You should feel free to do what you want with your setup. After all, that's the whole point of doing your own - to exercise full control of what your reports look like, what they say and how they work.

You format the toolbar by right clicking it and choosing "customize" at the bottom of the list, and then hitting the "rearrange" command and going through and adding and subtracting from the list on the right and moving the icons into the order you want. This will be a little time consuming at first but once you finish you won't have to do it again - unless you want to make changes later on.

For now and just to make things easier if you're following along, just use the following order and delete all the other icons you're not using. Reading the icons from left to right:

New file
open a file
save a file
print
print Preview
spell check
cut, copy, paste
undo, redo
insert hyperlink
autosum
sort
zoom%
Excel Help

The formatting commands to the right of the file commands include

font, font size, bold, italic, underline
justify left, center, right
merge (this is a command I use a LOT)
number formatting - dollars, percentage, increase and decrease decimals (changes "1" to "1.0000" and vice versa)
add indentation, subtract indentation
borders
cell color
font color in the cell
 

Attachments

  • toolbar.JPG
    toolbar.JPG
    47 KB · Views: 20
Last edited:
Your next step is to set your page up to make it easier to work with as you design your form. First, maximize the screen so the spreadsheet covers the entire thing. If you look at the bottom you'll see "sheet1" "sheet2" and "sheet3". These are tabs that enable you to switch from one sheet to another. You can set a sheet up to consists of several pages (such as a 3-page site description), or you can treat each sheet like it's own page - that's how I handle them.

If you right click on a sheet tab you get a list of ways to handle it. You can copy, delete, move, rename, etc. for now, just delete Sheet2 and sheet3. Don't worry, you'll be replacing them soon enough.
 

Attachments

  • sheets.JPG
    sheets.JPG
    16.3 KB · Views: 8
Next, set your view and column/line sizes. I normally resize the zoom to 130%, and I set my default for the verbiage I use on my forms to 7pt Arial. I use Arial 10 for my text fields. That way there's no confusing where the hardwired form is vs my original writing. You might not like those fonts. That's fine - do what you want to do.

Next, if you don't know for sure how many columns or lines you want to use in your form then just resize them to a default. For instance, the URAR has columns that don't line up at all from one section to the next. I try to avoid that because it clutters the view. They also use really short lines as a means of squeezing 80 lines per page. Those two factors are why those forms are so difficult to read. they were originally set up to be filled in with an IBM typewriter working working on single spacing. I like taller lines, so my normal default is 15pt.

To set line heights and column widths click the corner cell between "A" and "1" and then move the sliders for the columns to 5.00 width and 15.00 height. Now you can mix/match column widths as necessary
 

Attachments

  • width-ht.JPG
    width-ht.JPG
    32.3 KB · Views: 13
The last step for setting up the black pages for form design is to set the margins. Go to
file
page setup
margins

And set them for however big/small you want to use. For my forms I normally use very small margins so for the purpose of this tutorial I'm going to tell you to set them for .25 at the top, left, right and bottom; and set the header/footers at 0. You might want to use common headers or footers for your form later on - if so this is where you set those up for the page layouts. Personally, I don't use them.

Now you've set the page up so this page and every copy you make of this page will open with the same view and have the same formatting.
 

Attachments

  • margins.JPG
    margins.JPG
    43.4 KB · Views: 16
Now go back down to your "sheet1" tab, right click and "copy" it, moving it to the back. The copy will be named "sheet1(2)". You can right click that tab and rename it to "pg2" or "neighborhood, or whatever. For now, just add a couple sheets. Here's what those tabs look like in my land appraisal form:

Now you can either use each sheet for a single page in your report (which is what I mostly do) or you can use them for a section in your report and add however many pages to that sheet you want - you'll just have to scroll through them in order to move from one page to the next. As I say, i treat each sheet as a single page in the report. As you can see, the template for my land appraisal form only runs 9 pages. Despite how much I write on this forum, I don't get real carried away in my report writing - I aim my writing at my user expectations.

In case any of you are wondering, I add my exhibits in a separate "addenda" file so the images won't slow the report file I'm working on. Those are usually 10x the size of the report file itself.
 

Attachments

  • sheets in rpt.JPG
    sheets in rpt.JPG
    14.9 KB · Views: 8
Now you have 3 sheets to work with for a start, so lets get to designing a form. Go to "sheet1" and go to the top of the page. We're going to put in a header for your form. Highlight the cell range from A2 to R2 and then hit the "merge" command in the toolbar. It's the icon with the "a" on it that's in with the cell justification (left, center, right) commands. This will merge all these cells into a single cell.

This is a very important command to master because this is how you will create your text fields, which I use one text field for paragraph. You can resize this field using the line height at the left and changing the line height (and how much text will fit in the field) from 15.00 that we started with to however big or small you want that field to be. The screengrab below shows line 2 formatted at 15.00 height and line 4 formatted at 70.00, but you can make them a lot bigger than that. As a practical matter, a single cell or merged field will hold about 100 words or so before the "equation" overloads the program - after all, this is a spreadsheet that thinks everything is an equation.
I also used the border command to put a box around each field - that's also a command you'll be using a lot.

Now, highlight a portion of the worksheet from cell A1 to R21 (I normally start at the far corner and work in, not at A1) then go to
file
print area
set print area

That will tell the program which portion of the sheet you want to print. Only the area you highlight for printing will get shown, everything else you put on the sheet, like calculations or notes to yourself or whatnot - that doesn't get printed.

Now we can check our work. Hit the print preview button on your toolbar (next to "print") and it will show you what the page looks like at this point.
 

Attachments

  • merged.JPG
    merged.JPG
    63.6 KB · Views: 13
  • print area.JPG
    print area.JPG
    139.1 KB · Views: 10
  • preview.JPG
    preview.JPG
    38.5 KB · Views: 13
Now to format a field. Right click the smaller top line and go to "format cells". You'll get a multi-tab tool for changing the way numbers and text display in that box, types of borders you want to add or change, coloring the field, putting a pattern in it, and turning the cell protection on or off. Cell protection allows you to "lock" the content of the cell when you turn page protection on/off - that way you can't accidentally overwrite something when you're using the file. Personally, I don't use this feature when I'm the only user of a file. But you might want to lock in the contents of a cell to prevent accidental deletion or editing.

For now, let's go to "alignment" For the short line we're formatting, let's align the text to be "center" on the horizontal axis and also "center" for the vertical axis. If you aligned text to the left or right you could indent it using that command, and if you wanted to change the direction the sell read - like vertical or diagonal you could do that, too.

At the bottom there's "wrap" (which I'll show you in a minute), shrink to fit (I never use it) and "merge" which you already have checked 'cause you did it on the toolbar. Some of these commands are replicated on your toolbar, so that's normally where I perform those functions.

Close the box and proceed to those commands in the toolbar. Hit the "field color" button which is on the right of the setup I gave you and change the color to the lightest shade of gray. Then go to the Font size and change it from 7 to 12, then type in all caps "George Hatch is a geezer and he needs to go" in honor of the young guys who think the veteran appraisers ruined the appraisal business and have been doing the same thing for 30 years.

So there's a page or section header. Now lets go to the text field, right click to go to "format", then "alignment" and set the vertical alignment to "top" and the horizontal to "right" and then add "1" to the indent to offset the paragraph from border of the text field and close the dialog box out. Now you have a formatted text box that you can copy, move, resize or whatever by right clicking.

I'll add a little text and then take screenshots of the worksheet and the print preview to show you what I mean.
 

Attachments

  • text on worksheet.JPG
    text on worksheet.JPG
    131.2 KB · Views: 12
  • preview of text boxes.JPG
    preview of text boxes.JPG
    48.1 KB · Views: 12
Thanks for taking the time, but wouldn't a video be easier than typing George?

I did a modified 704 form way back in "the day" with Lotus on Win 3.11. Worked great. Needed a $1,500 laser printer (expensive back then) to print it though.
 
Needed a $1,500 laser printer (expensive back then) to print it though.
My first laser was a Star and it printed one page every 2 to 4 minutes... those were the days...
 
Status
Not open for further replies.
Find a Real Estate Appraiser - Enter Zip Code

Copyright © 2000-, AppraisersForum.com, All Rights Reserved
AppraisersForum.com is proudly hosted by the folks at
AppraiserSites.com
Back
Top